DousenClips user guide
DousenClips is a free Maya tool from Dousen for organizing animation clips and exporting them to FBX. This guide covers installation, your first export, independent takes, subclips, poses, import, external libraries and troubleshooting.
This guide covers installing DousenClips in Maya, organizing animation clips and exporting them to FBX. DousenClips is free and needs no Dousen license. For an overview of the tool, see the DousenClips page.
- Maya 2025 or later with PySide6.
- Free, with no Dousen license required.
- DousenDesktop is optional; the tool works on its own.
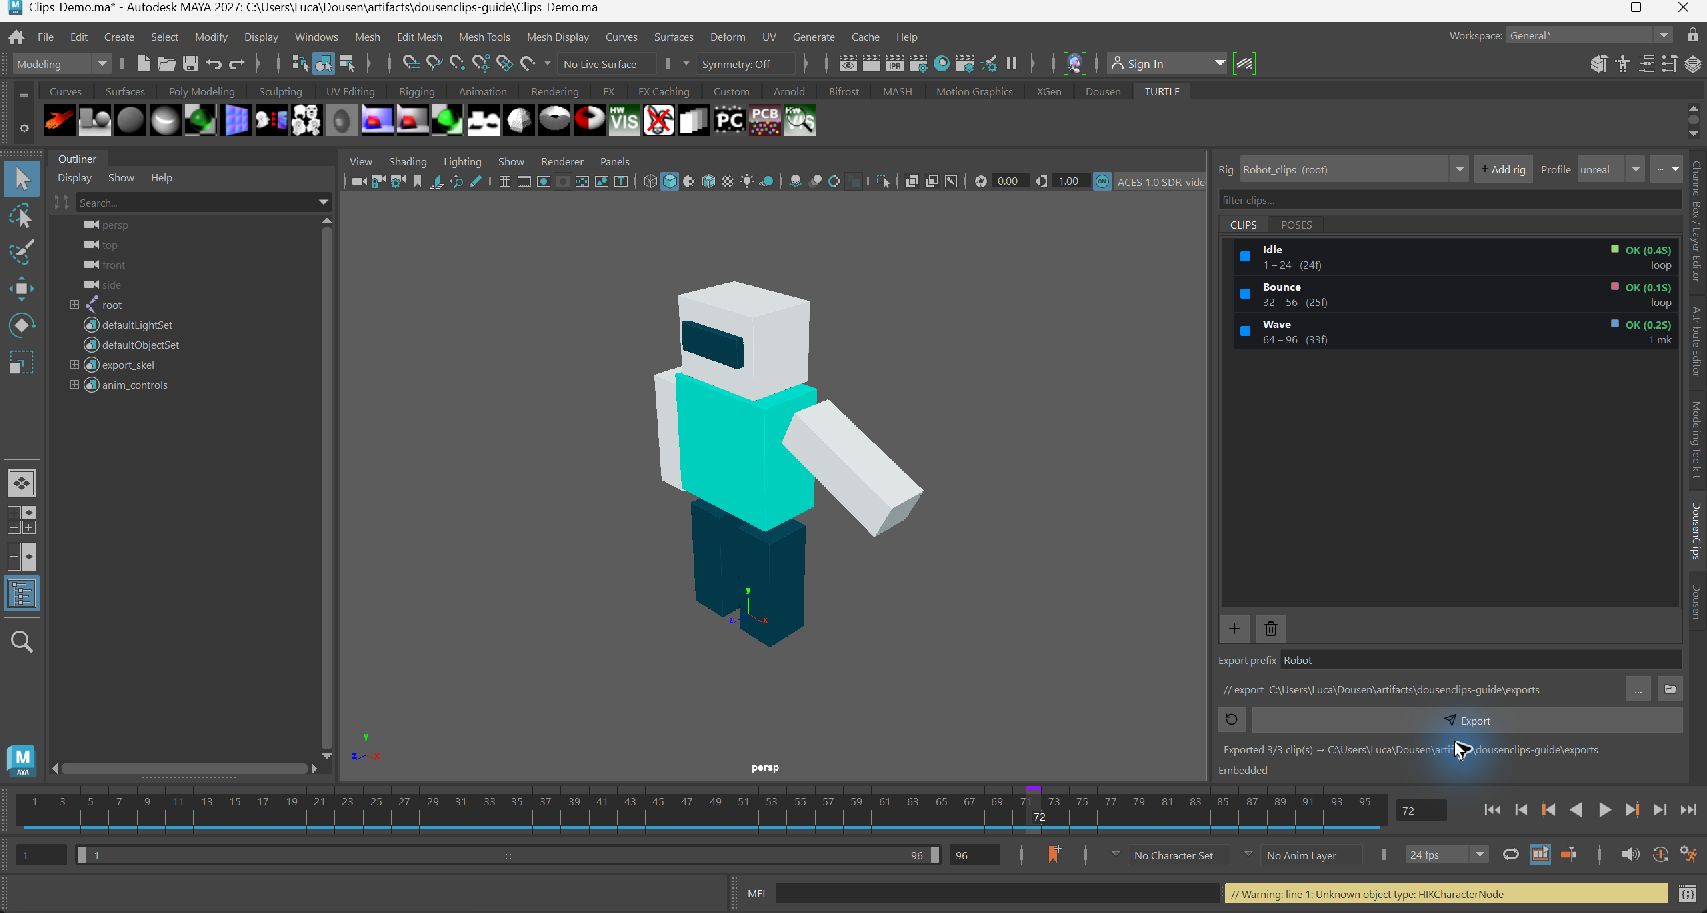
1. Getting started: install once, open from the shelf
DousenClips runs inside Autodesk Maya. It stores clip definitions with your scene and exports animation through a temporary, clean skeleton. DousenDesktop is optional; you can use the tool on its own.
What you need
- Maya 2025 or later with PySide6. The screenshots and export walkthrough here were captured in Maya 2027 on Windows.
- The complete DousenClips distribution, including
install.py,scriptsandicons. This guide is documentation, not the installer. - A rig with an exportable joint hierarchy. For independent takes, the rig also needs an
anim_controlsselection set.
- Extract the package to a permanent folder. For example,
C:/Tools/DousenClips. Keep the folder's contents together. - Open Maya. Drag
install.pyfrom your file manager into the Maya viewport. - Open the Dousen shelf. Click the mint filmstrip Dousen Clips button, labeled "Clips" on the shelf.
The installer registers the folder as a Maya module and adds or updates the shelf button. Running it again updates that button without creating duplicates. Keep the installed folder in place.
If the shelf button is missing
In Maya's Script Editor → Python tab, run:
from dousenclips.ui import show
show()
If Python cannot find dousenclips, rerun the installer from the extracted folder and restart Maya.
Manual installation
Create DousenClips.mod in your Maya user modules directory. On a typical Windows setup this is Documents/maya/modules; a customized Maya user directory may differ. Use your actual installation path:
+ DousenClips 1.0 C:/Tools/DousenClips
PYTHONPATH +:= scripts
Restart Maya, then run the Python launch command above. Manual module setup alone does not create the shelf button.
Update or remove
For an update, close Maya, replace the installed package with the new complete version, then rerun its installer. To remove it, run python install.py --uninstall from the package folder. When run outside Maya, remove any remaining shelf button manually. Your animation scenes and exports remain separate from the installation.
2. Your first export: turn animation into named clips
Start with a saved scene and one character. A clip set groups a rig's clips and export settings; each clip describes an animation range or owns an independent take.
- Add your rig. Select a rig control or joint and click Add rig. Check that the Rig selector points to the expected skeleton. If an
export_skelselection set exists, it takes priority during detection. - Choose your workflow. For ordinary timeline clips, highlight a frame range with Shift-drag on Maya's timeline, or set the playback range, then click + in the CLIPS tab. Name the clip, for example
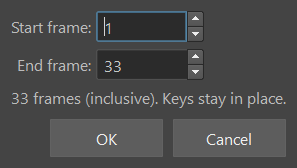
Idle. See the note below if the rig uses independent takes. - Review the range. Right-click → Edit range… and set Start and End together in one dialog, or use Set range from timeline. This works for internal clips, takes and external clips; external clips require Edit / Check Out first. End frames are inclusive: 1–24 contains 24 frames.
- Choose an export profile. Select unreal or unity in the header.
- Choose a destination. Click the … beside the export path. Set Export prefix to a useful character or scene name.
- Tick the clips to export. Click Export, then check each clip's result. Use the folder button to inspect the written files.
When + creates a new take: if the rig has an anim_controls set, or the set already contains takes, + creates and activates a new take from the default pose. It does not capture your existing animation. Use Capture take from current range on an existing timeline clip to capture authored animation, or Import clips from files… to bring in animation scenes. Save before changing workflows.
What success looks like
The clip cards show green OK results. The demo exported:
Robot_Idle.fbx
Robot_Bounce.fbx
Robot_Wave.fbx
Robot_Wave.notifies.json
Robot is the export prefix. Wave includes a notify, so it also produces an event sidecar.
The screenshot uses $CLIPS_EXPORTS, an environment variable configured for this demo. For your first export, browse to a normal folder.
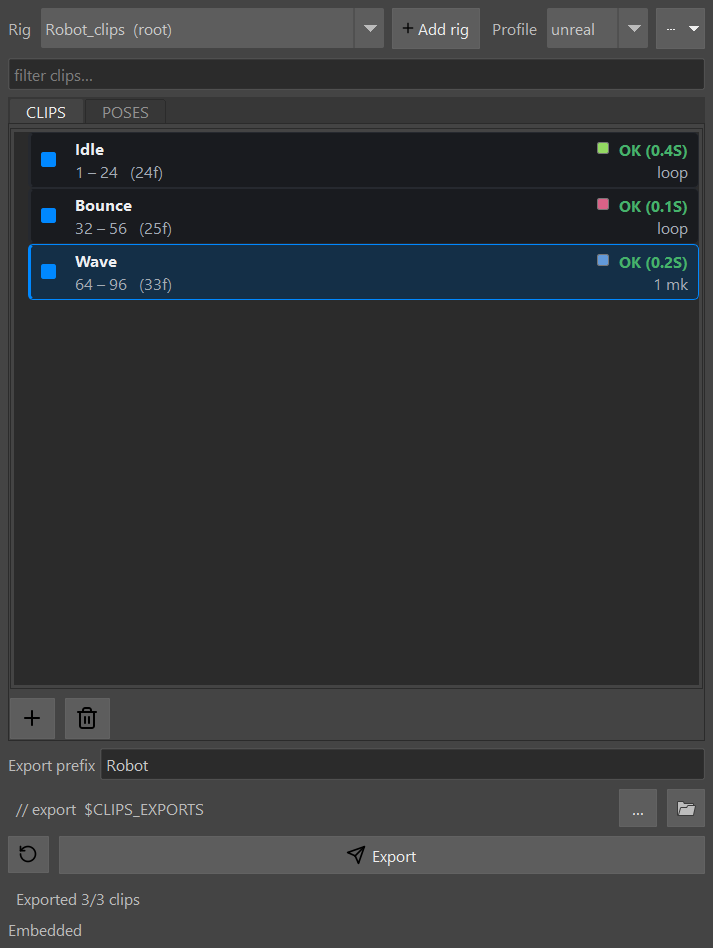
Selection and export checkboxes are different. The main Export button processes enabled clips in the current tab. To export only highlighted rows, right-click → Export selected. Those rows must still be enabled. A text filter is for finding clips; use checkboxes or Export selected to control output.
3. Find your way around: a short tour of the panel
| Control | Use it for |
|---|---|
| Rig | Switch between clip sets for different characters in the same scene. |
| Profile | Choose engine export policy. Unreal is the default; Unity uses a character@clip naming convention. Custom is a neutral base for pipeline configuration. |
| ⋯ tools menu | Import animation, create clips from bookmarks, render previews, exchange JSON and manage external libraries. |
| Filter | Find clips by name. |
| CLIPS / POSES | Work with animation ranges or single-frame poses. |
| Clip card | Read its name, frame range, frame count, loop flag and status. The colored square identifies its timeline color. |
| Checkbox | Include or exclude a clip from export. |
| + / trash | Create a clip or pose, or delete selected definitions. Save your work before removing clips or takes. |
| Export prefix | Defaults to the saved scene's filename without its extension. Edit to override, or clear for no prefix. An unsaved scene has no automatic filename prefix. |
Useful gestures
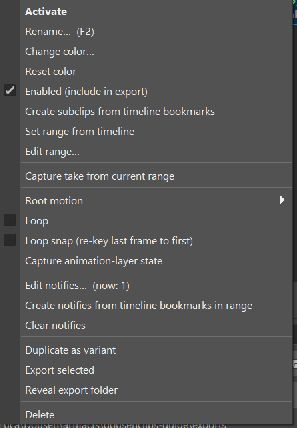
- Double-click a clip to activate it or frame its timeline range.
- Press
F2on a clip to rename it. - Right-click for clip settings and export actions.
- Use Maya's colored timeline bookmarks to see animation ranges.
- Change a clip's color through its context menu.
For a captured take, Activate swaps its animation onto the rig. For a timeline-only clip, it frames the relevant timeline range.
4. Independent takes: when clips need their own animation
There are two ways a clip can relate to animation.
- Timeline clips are named windows into one continuous animation timeline. Overlapping clips read the same underlying animation.
- Independent takes each own captured animation. Activate one to edit it on the rig, then switch to another clip's animation.
Capture existing animation
- Ensure the rig has an
anim_controlsselection set containing the controls whose animation the take must own. This is different from the export joint set. - Start from an existing timeline clip with the correct range and animation currently on the rig.
- Right-click → Capture take from current range.
- Double-click the captured clip to activate it. New captures normally use a local timeline beginning at frame 1.
- Animate normally. Switching away from an embedded active take captures its current edits before activating the next one. Save the Maya scene to persist your work.
A clip marked ACTIVE owns the animation currently connected to that rig. Only one take per rig is active at a time. Imported takes can begin at frame 0; follow the range displayed on the card.
Start a new animation
On a rig configured for takes, click +, name the new take, and animate from its default pose. The active take's bounds follow Maya's Animation Start/End fields. Adjusting those bounds does not move or delete keys; the playback preview range stays within them.
Layers and related clips
Takes can retain editable Maya animation layers. The clip menu provides layer actions. A derived clip shares a parent's captured base and adds its own layers or overrides; a variant is useful for alternative layer-state combinations. A mirror action creates an opposite-side take when the rig's joint naming or mirror mapping supports it.
Embedded versus external: switching embedded takes captures changes in scene memory. External-library clips need Save Clip to write their authoritative file. Neither workflow makes saving your Maya working scene unnecessary.
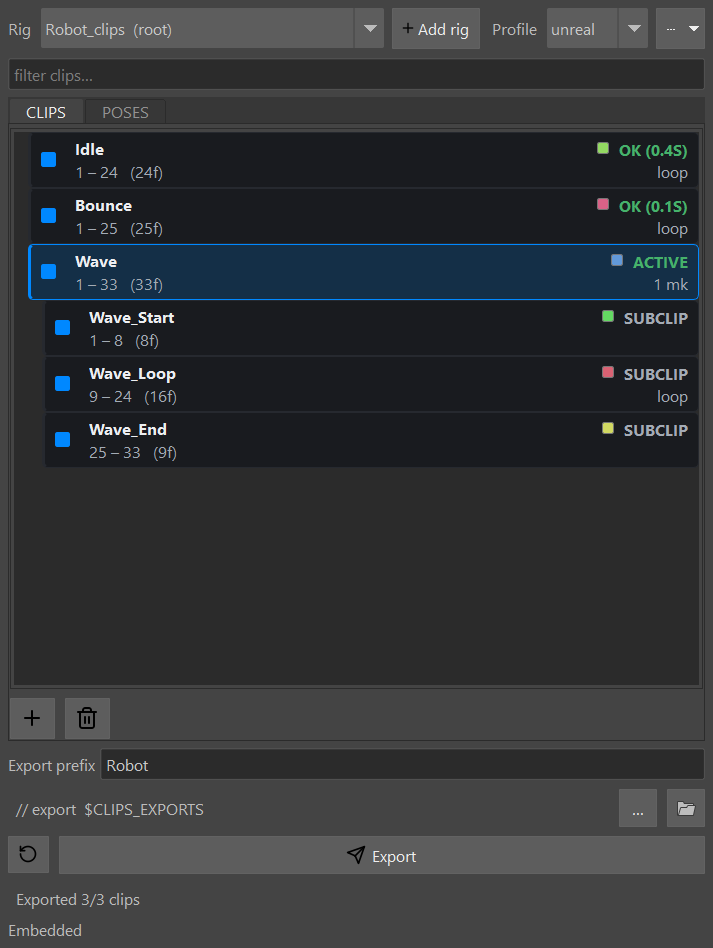
5. Subclips and poses: split a performance into Start, Loop and End
- Activate the parent animation.
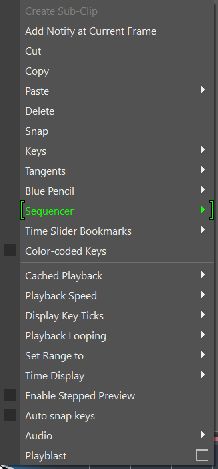
- Shift-drag a range on Maya's timeline.
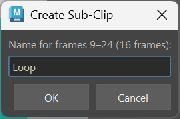
- Right-click that range → Create Sub-Clip, then give it a name.
- Repeat for other sections. Right-click the looping section and enable Loop.
- Double-click a child to preview its range. Resize its timeline bookmark or use Edit range… to adjust it.
A subclip shares its parent's animation, layers and morph controls, while keeping its own range and loop flag. It can be exported separately.
The example divides a 33-frame take into 1–8, 9–24 and 25–33. A selected range of 10–19 is exactly ten frames.
Capture a pose
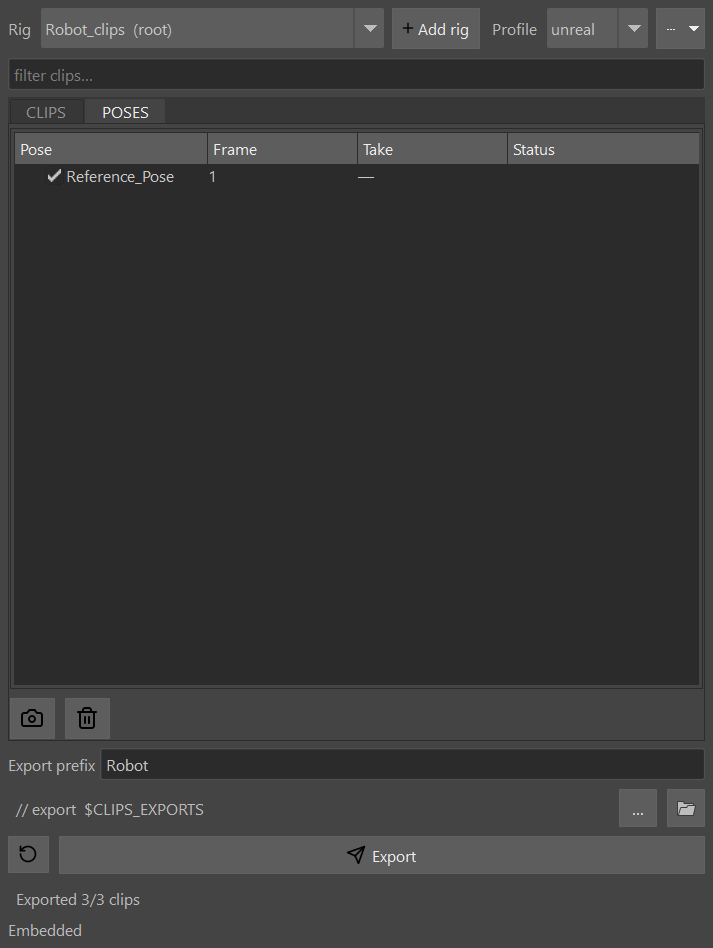
Move to the desired frame, switch to POSES, then click its capture button. Name the pose and review its frame. When the rig is configured for takes, pose capture also stores the current pose as an owned take. Double-click to activate or go to it, and export from the POSES tab.
6. Polish your export: set motion, loops and events
Root motion
Right-click a clip → Root motion. Choose the mode that matches your engine setup:
| Mode | Result |
|---|---|
authored | Preserve the root motion authored on the rig. |
in_place | Zero the configured root channels on the export skeleton. |
hip_extract | Transfer world-space hip movement to the export root, useful for pelvis-driven rigs. |
| Origin at start | Offset exported motion relative to its starting position. |
| Inject root joint | Add an export root for a rig that needs one, such as a pelvis-rooted hierarchy. |
These operations affect the temporary export skeleton. Review a test FBX in your target engine before committing a whole animation set.
Loop and Loop snap
Loop marks the animation as looping and checks the first/last-frame seam after baking. Loop snap re-keys the final frame to the first on the export skeleton. It can close a seam, but it does not replace checking the quality and rhythm of the cycle.
Animation-layer state
Set the scene's layer mute, solo and weight values, then use Capture animation-layer state on the clip. This allows, for example, normal and injured versions of the same motion. Export applies the stored state and restores the original scene layer state afterwards.
Notifies: footsteps, hits and effects
From the timeline: activate the clip, move the playhead to the event frame, then right-click Maya's timeline → Add Notify at Current Frame. Enter the event name. The event appears as a one-frame timeline bookmark.
From the clip: right-click its card → Edit notifies… to add or edit events, change their frames and names, or supply an optional JSON object in Params. Keep event frames inside the clip's range. For an independent take, use its local frame numbers.
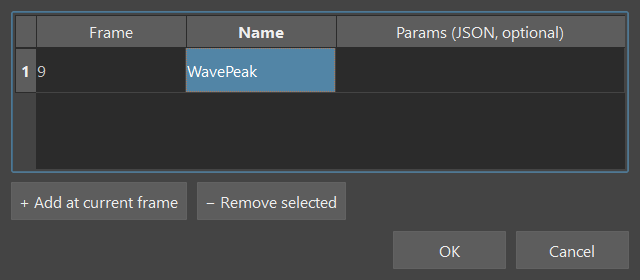
Export writes a .notifies.json sidecar and attempts to encode event spike curves in the FBX. Keep the JSON beside the FBX for your pipeline. This does not automatically create native Unreal AnimNotifies; that requires an importer or manual setup in the engine.
7. Import and backup: bring scenes in, keep useful copies
Import animation files
- Add the destination rig, with its
anim_controlsset. - Open the ⋯ menu → Import clips from files….
- Select Maya
.maor.mbscenes using the same rig and frame rate. - Review the imported clips and play each one.
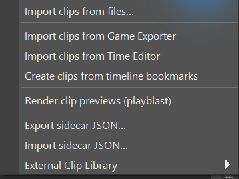
The source scene's saved Animation Start/End determines its range, retimed to start at 0. Import creates new clips. Matching files such as Jump_Start.ma, Jump_Loop.ma and Jump_End.ma can become one parent animation with consecutive subclips; the Loop section is flagged as looping.
The tools menu can also import definitions from Maya Game Exporter, Time Editor or timeline bookmarks. These are separate import paths from reading animation scene files.
Save and back up
- Save the Maya scene to preserve embedded clips and animation.
- Use Export sidecar JSON… to create a portable clip metadata snapshot; captured takes can round-trip through this format too.
- Keep the rig, its references and the Maya scene. A JSON sidecar is not a complete character or project backup.
- Use Import sidecar JSON… for transfer or recovery against the appropriate rig.
Preview GIFs
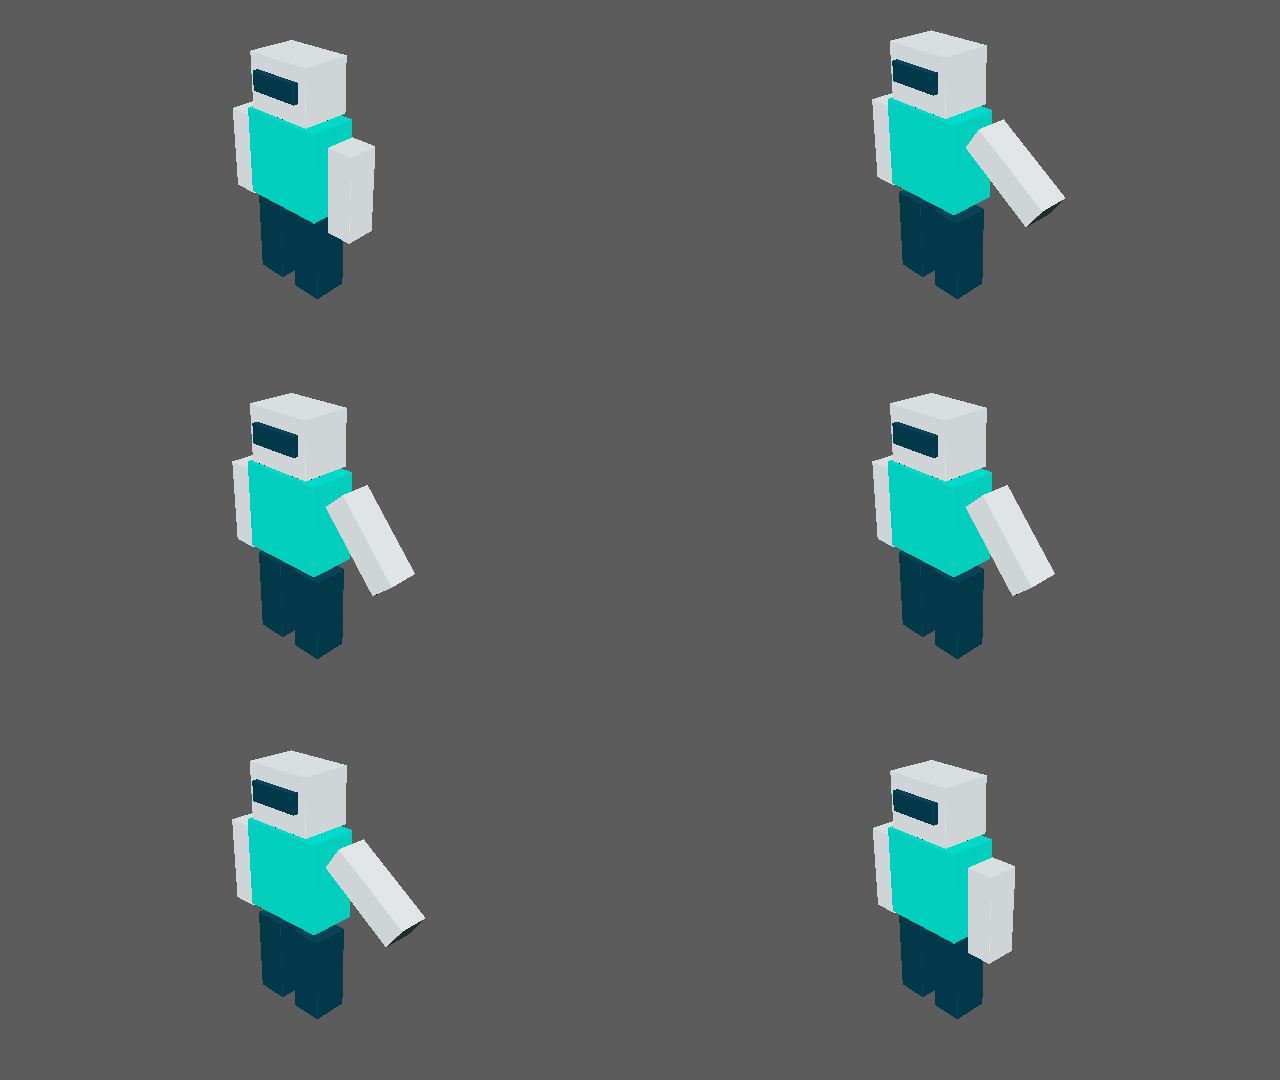
Choose Render clip previews (playblast) in the tools menu. Once rendering finishes, hover over a clip to see its animated preview. For embedded clips, the GIFs are saved under <scene>.dousenclips_previews.
8. External clip libraries: one animation, one complete Maya scene
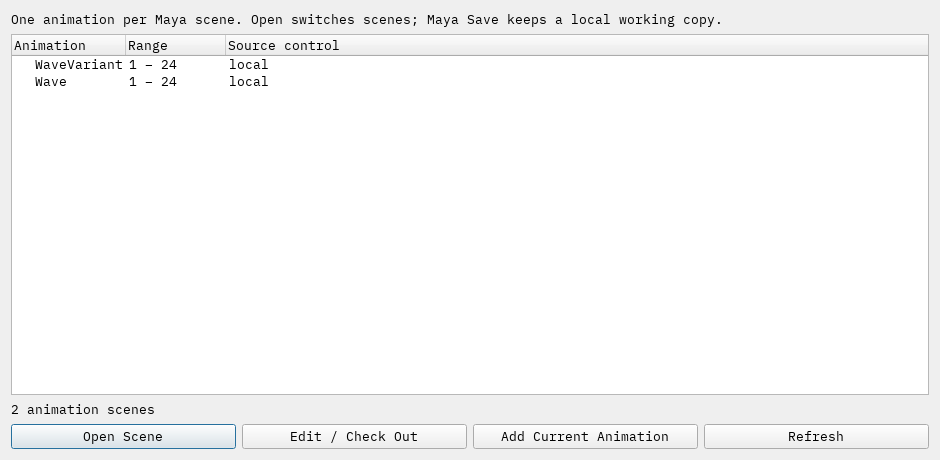
An External Clip Library stores each animation in a standalone Maya scene, including its rig, geometry, references, constraints and animation layers. Open the scene to animate or export it. There is no need to import disconnected curves into a separate working rig.
- Open Tools → External Clip Library. Choose Create Scene Library, or Convert Animations to Scenes to copy existing embedded or legacy library animations into an empty folder.
- Choose Standalone for local use or Perforce for exclusive team checkout.
- Choose Browse Scene Library. Each entry represents one full animation scene. Subclips remain sections inside their parent scene.
- Open Scene or double-click to open a local preview copy. Maya asks how to handle unsaved changes when leaving the current scene.
- Choose Edit / Check Out to open a working copy with ownership, or Edit / Check Out Current Scene after opening a preview.
- Animate and use the normal DousenClips export controls to export this scene's animation or its subclips.
- Choose Save Library Scene to publish the complete scene. Submit or shelve through your usual Perforce client.
Maya Save keeps your local working copy. Use Save Library Scene to update the shared animation scene. A library save verifies the full scene, requires ownership and refuses changed source revisions. It does not submit or release a Perforce checkout. Keep regular local scene saves.
Use Add Current Animation in the browser to add an existing scene with one DousenClips animation. Scenes containing several animations use Convert Animations to Scenes instead. Conversion copies the full scene for each animation, makes variants and derived takes independent, and preserves the original scene and legacy library files.
The browser shows source-control ownership next to each entry. Standalone libraries are single-writer local libraries. Perforce sources require exclusive-open +l file types. Status checks do not automatically sync or check out files; sync using your normal Perforce client, then reopen the entry.
Library scenes are native Maya ASCII files and can open directly in Maya. Referenced rigs, textures and plug-ins still need their normal project dependencies. The Legacy Curve Library menu remains available for older libraries.
9. Troubleshooting: when something does not look right
| Symptom | Try this |
|---|---|
| No shelf button / import error | Confirm the package was extracted completely, rerun install.py from its permanent folder, then restart Maya. Try the Python launch command in section 1. |
| Add rig finds the wrong skeleton | Select the intended root joint and check the contents of any export_skel selection set. Confirm the Rig dropdown before creating clips. |
| + creates a blank/default pose | The rig is configured for independent takes. Capture an existing timeline clip or import animation files to preserve an authored performance. |
| Nothing to export | Check the current CLIPS/POSES tab and clip checkboxes. For Export selected, select the intended rows and ensure they are enabled. |
| Too many clips exported | The main Export button uses enabled clips, not just highlighted rows. Use Export selected for a subset. |
| Export blocked or failed | Read the validation message or clip result. Check root hierarchy, ranges, filename collisions, missing layers and output-folder access. For FBX plug-in errors, check Maya's fbxmaya plug-in. |
| Take capture misses controls | Check that anim_controls contains the intended rig controls and that its membership matches the character. Re-capture only when the correct animation is on the rig. |
| File import fails to match a rig | Use the same rig and frame rate. Missing channels or ambiguous control names must be fixed; the importer rejects partial matches. |
| Loop seam or root drift | Review Loop/Loop snap and root-motion settings. Test the FBX in the target engine before batch export. |
| External clip cannot save | Choose Edit / Check Out, inspect the owner/revision tooltip and resolve source-control or disk changes. Reopening Maya requires reacquiring edit ownership for external saves. |
Publishing with Dousen
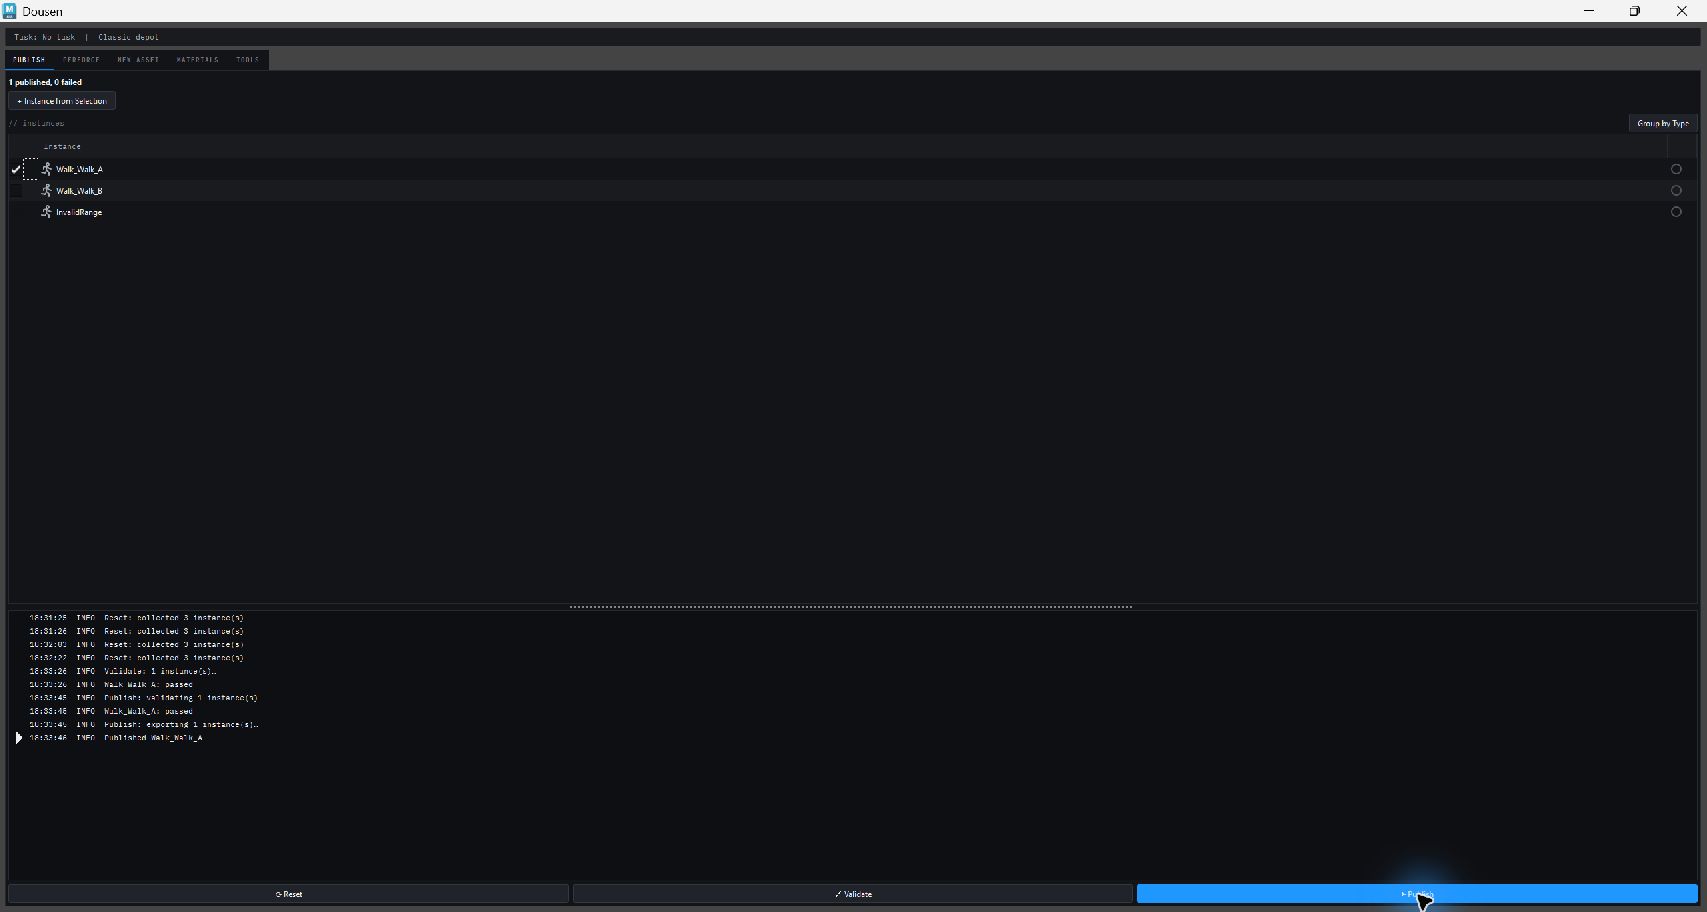
When the Dousen Maya addon is installed, checked takes and subclips appear automatically in its Publish tab. Both panels share their checkboxes. DousenClips Export uses Dousen validation, project output paths, checkout and per-instance publish bundles, including notifies. Errors block export; warnings ask for review. A rejected publish does not fall back to standalone export. Update the Dousen addon if prompted.
In a scene library, Maya Save keeps the local working scene, Save Library Scene writes the shared animation source, and Export publishes the selected animation assets through Dousen. Without Dousen installed, standalone FBX export remains available.
For pipeline users: headless export
Run with Maya's mayapy and make the installed package's scripts directory available on PYTHONPATH. Replace the scene, set and clip names below with your own:
mayapy -m dousenclips list scene.ma
mayapy -m dousenclips export scene.ma --set hero_clips --clips walk,run --profile unreal --out C:/Exports --report report.json
Exit codes: 0 success, 1 clip failures, 2 validation blocked, 3 usage or scene error.
Screenshots in this guide were captured from the DousenClips panel in Maya 2027 on Windows, using a purpose-built robot demo. The walkthrough exported three FBX animations and a notify sidecar. It did not exercise every engine, installer platform or Perforce team workflow. The Dousen integration screenshot uses an isolated Maya test rig. The demo character is illustrative; use your own production rig and project paths.
Related
Dousen is free during the studio beta, with access by request, and free forever for teams of up to 5 users. Request early access.